The design and layout of all the transaction screens are similar, the following common functions will look really familiar as you go along.
Let's take Invoice as example.
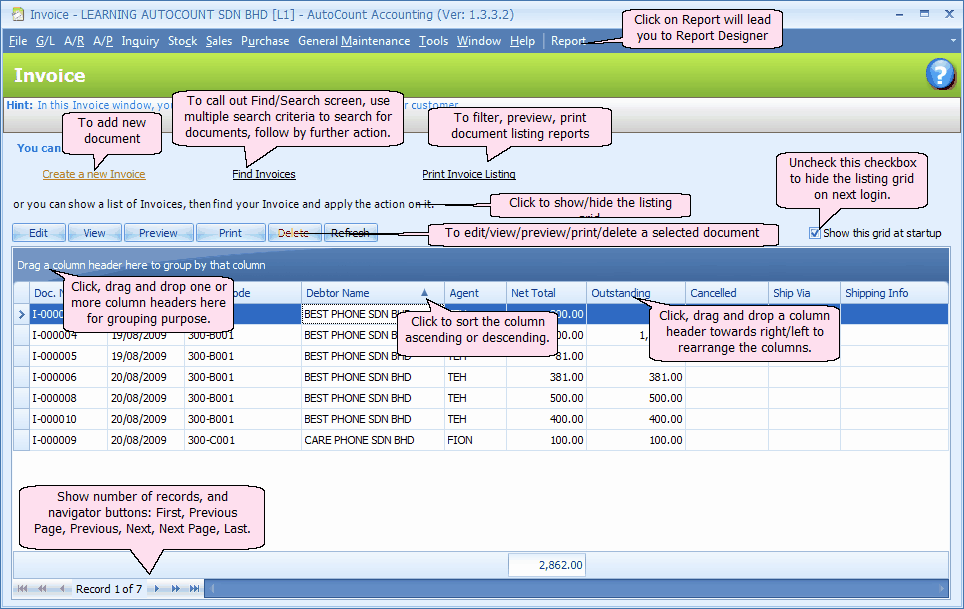
From the main page of Customer tab, click on the word 'Invoice' to show the Invoice listing screen,
(Or go to Sales > Invoice)
General Functions
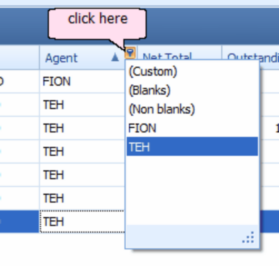
Column Filter
Click on any of the column headers, then click on the drop down (small button) at the top right, to select the filtering criteria for this column.
Column Functions
Right click on any of the column headers, you have more options related to the column(s):
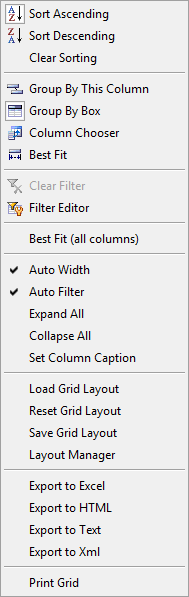
Sort Ascending: sort ascending for this column. You may also click on the ascending button on the column header.
Sort Descending: sort descending for this column. You may also click on the descending button on the column header.
Clear Sorting: clear sorting for this column.
Group By This Column: this will place the column header onto grouping bar (dark blue bar above column header), same effect as drag and drop the column header there.
Group By Box: this is to hide/show the grouping bar.
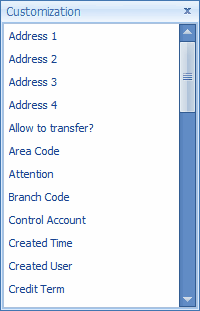
Column Chooser: to show a list of available column headers so that you may drag and add column(s) onto the column headers. To remove a column, just drag and move the column header downwards, release the mouse when a cross sign is displayed.
Best Fit: to set the width best fit the column.
Best Fit (All Columns): to set the width best fit all columns.
Clear Filter: to clear the filter (if any)
Filter Editor: to set filter using filter builder.
Auto Width: to automatically set the column width according to the size of windows
Auto Filter: to automatically set the filter
Expand All: to expand all the records
Collapse All: to collapse all the records
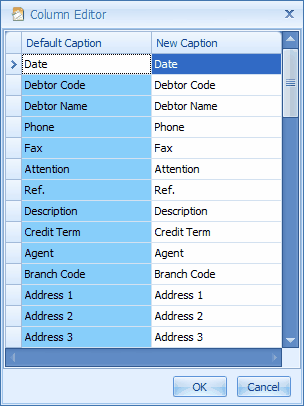
Set Column Caption: to rename the caption of column header
Load Grid Layout: to load (select) from a list of grid layout that were saved earlier.
Reset Grid Layout: to set the grid layout to system default layout
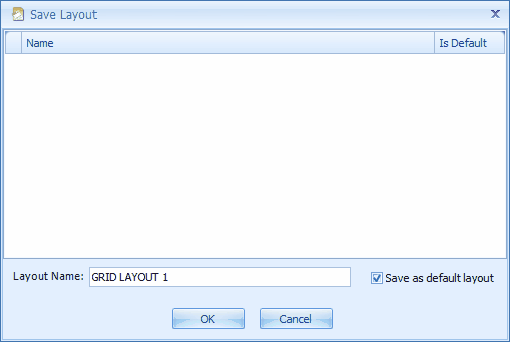
Save Grid Layout: to name and save the current grid layout, you may also set it to be the default grid layout.
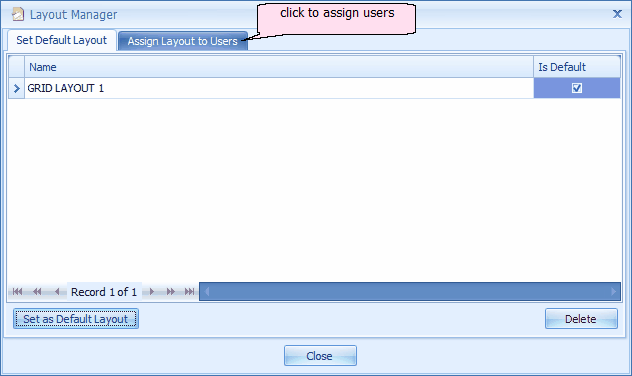
Layout Manager: to set default layout, to delete a layout, and to assign different layout to each users.
Export to Excel/HTML/Text/XML: to send the current grid contents to Excel/HTML/Text/XML files.
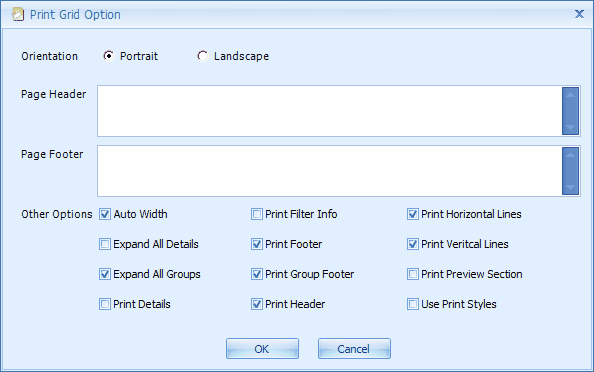
Print Grid: to print the current grid contents.
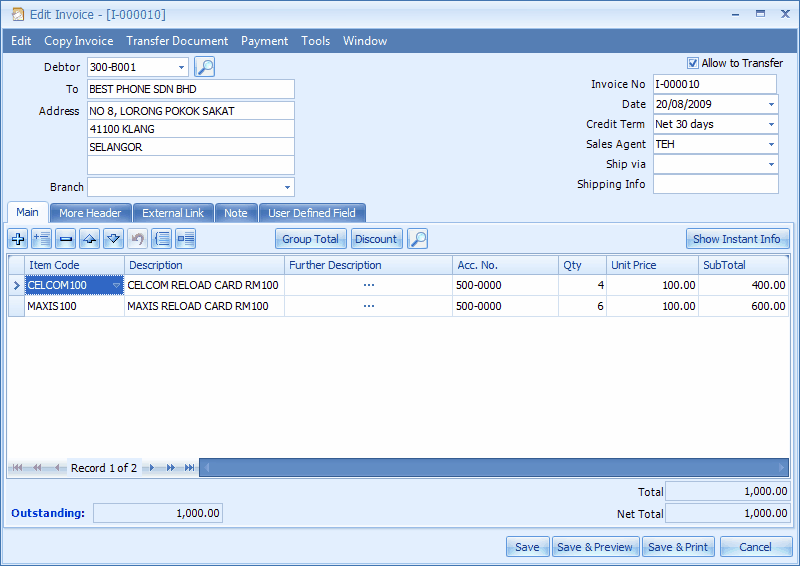
Create New / Edit / View Document/Transaction
Menu Bar - Edit
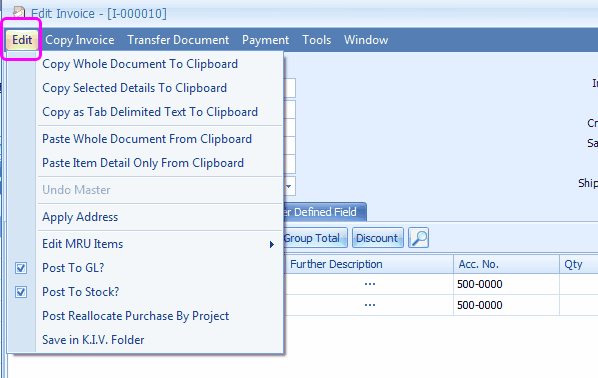
Click on Edit menu, you may copy/paste the whole documents/only details to/from clipboard. For example, go to Sales > Cash Sale, select a document, click on Copy Whole Document to Clipboard, then create a new Invoice and click on Paste Whole Document from Clipboard.
Copy as Tab Delimited Text to Clipboard: copy in this way allows you to paste it onto Excel worksheet.
Edit MRU Items: to edit/delete historical descriptions (which was keyed in previously). MRU = Most Recently Used.
Undo Master: to undo (reverse one step) the header section.
Apply Address: to choose between billing address and delivery address.
Post To GL/Stock?: to define either to post or not to post upon saving the document/transaction. Also refer to User Access Rights setting, Options > Invoicing > Document Control 2 and Tools > System Option Policy.
Save in K.I.V. Folder: save the incomplete or temporary bill/transaction to K.I.V. Folder (can later be retrieved at Tools>Open K.I.V. Folder). K.I.V. Folder is also used in Auto-Save function, see Tools > Current Users Setting. Whenever there is a document saved under K.I.V. Folder, reminder message will be prompted upon login to this account book.
Menu Bar - Copy Invoice
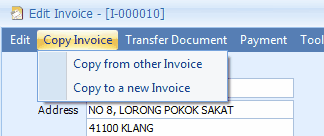
You may also copy from other transaction or copy to a new transaction.
Menu Bar - Transfer Document

Click on Transfer Document to transfer transaction from related documents (Full Document Transfer or Partial Item Transfer). You may also check the transferred status of this document.
The transfer can be either Full Document Transfer or Partial Item Transfer. For example, click on Create A New Invoice, select Debtor, click on Transfer Document > Transfer From Quotation,
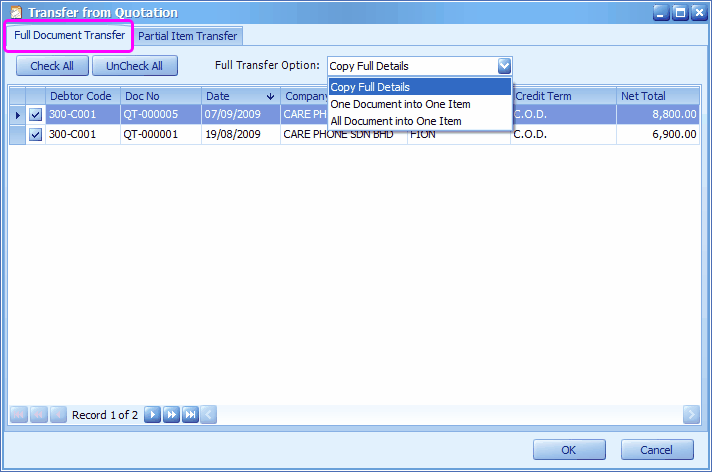
Full Document Transfer: click on this tab, the documents available for transfer will be listed, you may check the documents to be transferred.
Full Transfer Options: select the transfer option.
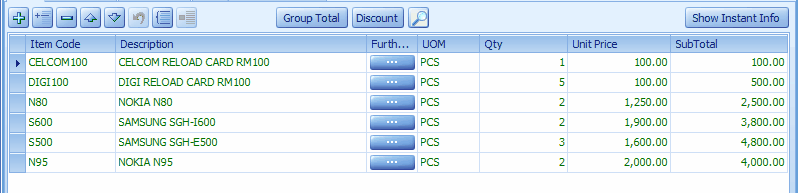
Copy Full Details: to transfer all the details into Invoice.
One Document Into One Item: to lump all the details of each document (in this case: each Quotation) and show as one item (one row for each document) in Invoice detail; the quotation number will be shown as the item description in Invoice detail.

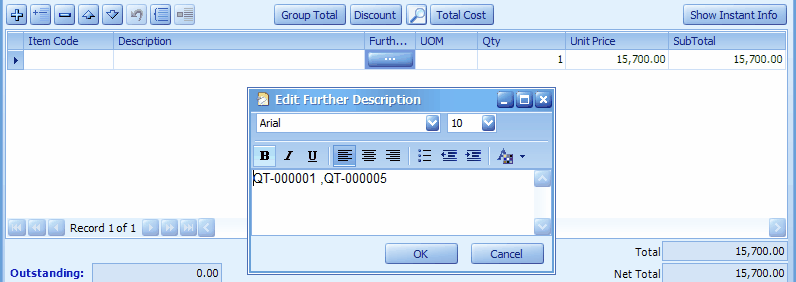
All Document Into One Item: to lump all the details of selected documents (in this case: all Quotations) and show as one item (one row) in Invoice detail; the quotation numbers will be shown in Further Description column in Invoice detail.
Partial Item Transfer: click on this tab, the outstanding items available for transfer will be listed, you may check the item rows and key in the quantity to transfer.
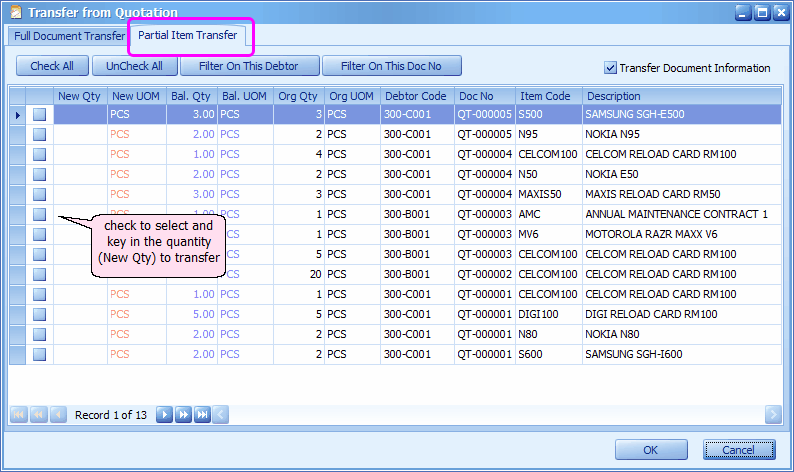
Check All: to select all the item rows
Uncheck All: to uncheck all the selected item rows
Filter On This Debtor: (if debtor code was left blank on the document) highlight the debtor code of any item row, click on this button will filter and list only item rows related to the same debtor.
Filter On This Doc No.: highlight the document number of any item row, click on this button will filter and list only item rows related to the same document number.
Transfer Document Information: to copy all information such as More Header, External Link, Note.... from source document
Menu Bar - Payment

For a saved invoice, you may directly add a payment entry here. (this feature is available for Sales Invoice and Purchase Invoice only).
Menu Bar - Tools

Refresh Account No: to refresh G/L account code according to Stock Group or Default G/L Posting setting.
Profit Calculator: to calculate the profit margin for each transacted item.
Change Unit Price: to change the unit price with authority password (should the access rights is granted); this feature is used when the 'Unit Price' field is barred from edition (refer to Edit Column Lock at Tools > Options > Invoicing > Customize Invoicing. )
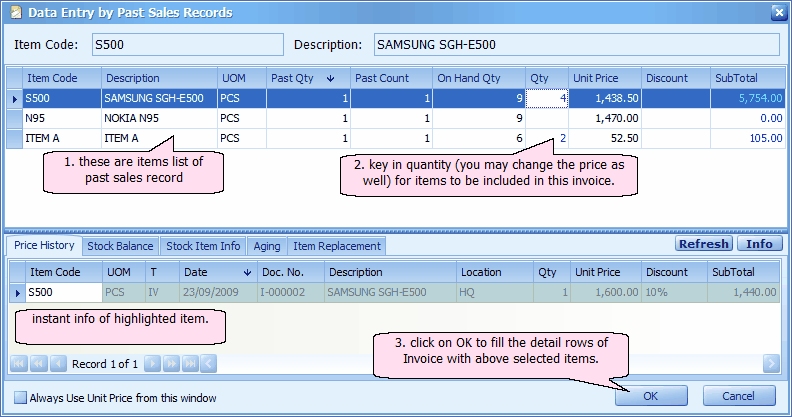
Data Entry By Past Sales Records: to show and use the records of previously transacted items for this customer. (see Data Entry by Past Records)
Menu Bar - Others (from version 1.3.5.08 onwards)
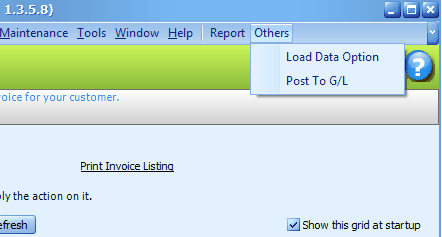
Load Data Option: to specify the number of recent days when loading data instead of to load all data, so that the loading speed can be further improved. See 13508 Load Data Option for more details.
Post To G/L: to post several document at one go. See 13508 Post To G/L For Several Documents for more details.
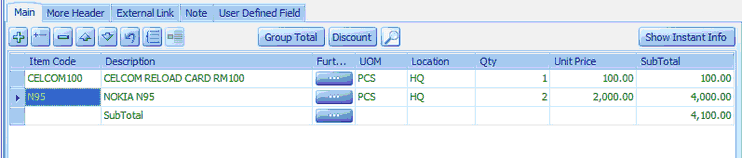
Functional Buttons
![]() to add / insert a detail row. (Insert)
to add / insert a detail row. (Insert)
![]() to insert a detail row before the highlighted row. (Ctrl + Insert)
to insert a detail row before the highlighted row. (Ctrl + Insert)
![]() to delete highlighted row. (Ctrl + Delete)
to delete highlighted row. (Ctrl + Delete)
![]() to move the detail row up/down. (Alt + Shift + Up/Down)
to move the detail row up/down. (Alt + Shift + Up/Down)
![]() undo (Ctrl + Z)
undo (Ctrl + Z)
![]() to select all detail rows (Ctrl + Alt + A), so that it can be deleted or modified in one shot (using Range Set)
to select all detail rows (Ctrl + Alt + A), so that it can be deleted or modified in one shot (using Range Set)
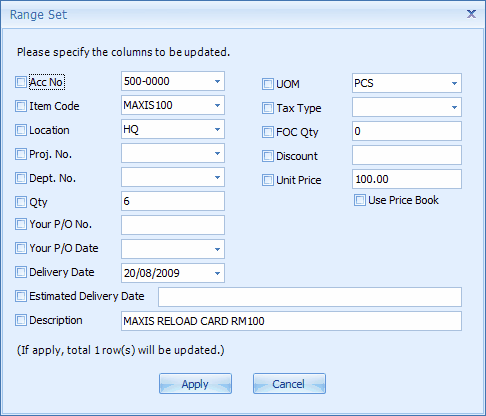
![]() range set (F12)... a range setting windows will be prompted. This is usually used to apply changes to several/all selected detail rows.
range set (F12)... a range setting windows will be prompted. This is usually used to apply changes to several/all selected detail rows.
![]() to add a subtotal row, showing the subtotal amount.
to add a subtotal row, showing the subtotal amount.
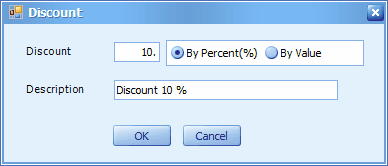
![]() to add a discount row, and for you to define the group discount by define the percentage % or Value.
to add a discount row, and for you to define the group discount by define the percentage % or Value.
![]() to prompt the item search screen (F9)
to prompt the item search screen (F9)
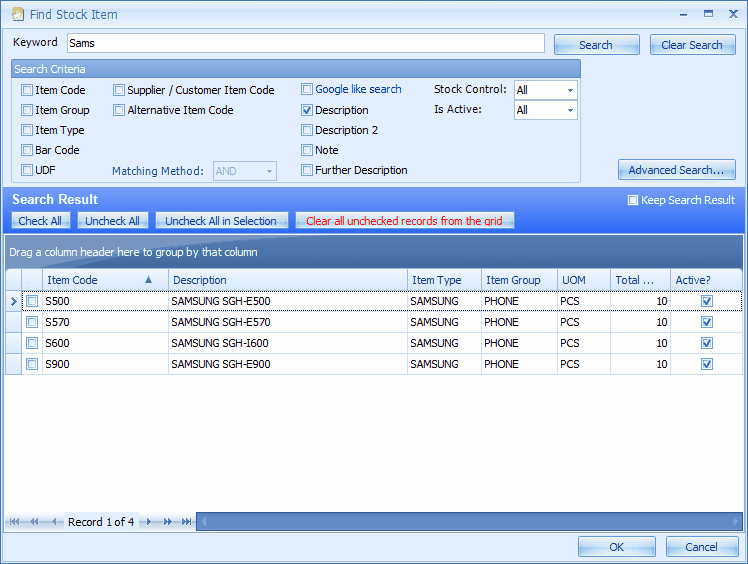
Type a keyword, select search criteria, click on Search. From the search result, check the checkboxes to select items to be included into the document, then click on OK.
Google like search: this makes searching easier by using conditional operators AND and OR.
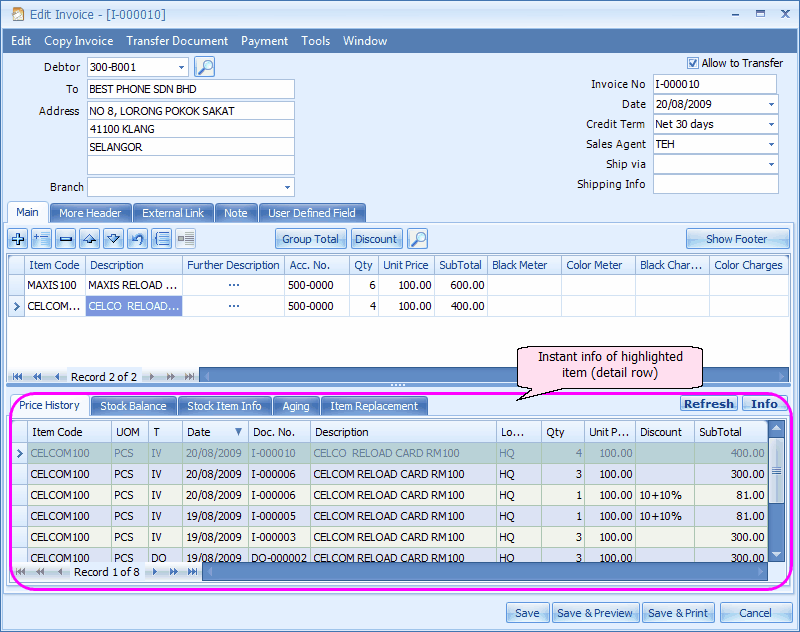
![]() click on this button will display (at bottom section) instant information related to the highlighted item, such as Price History, Stock Balance ...
click on this button will display (at bottom section) instant information related to the highlighted item, such as Price History, Stock Balance ...
More Header: to provide additional information about his document.
External Link: allows to maintain cross reference links in other formats, such as Excel, Word documents, Image files...
Notes: allows to type in additional notes.
Cancel Document
Click on View, observe the action button at the bottom, other than Preview, Print, Edit and Delete, here you may Cancel Document. The cancelled document can be 'Un-cancelled' later.

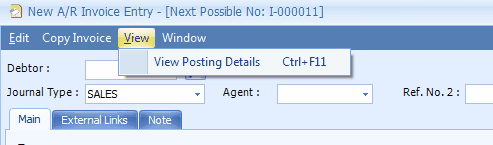
For G/L, A/R and A/P Transaction
On the Create New / Edit transaction screen, click on View, you may View Posting Details (showing the complete double entries) of the selected document.
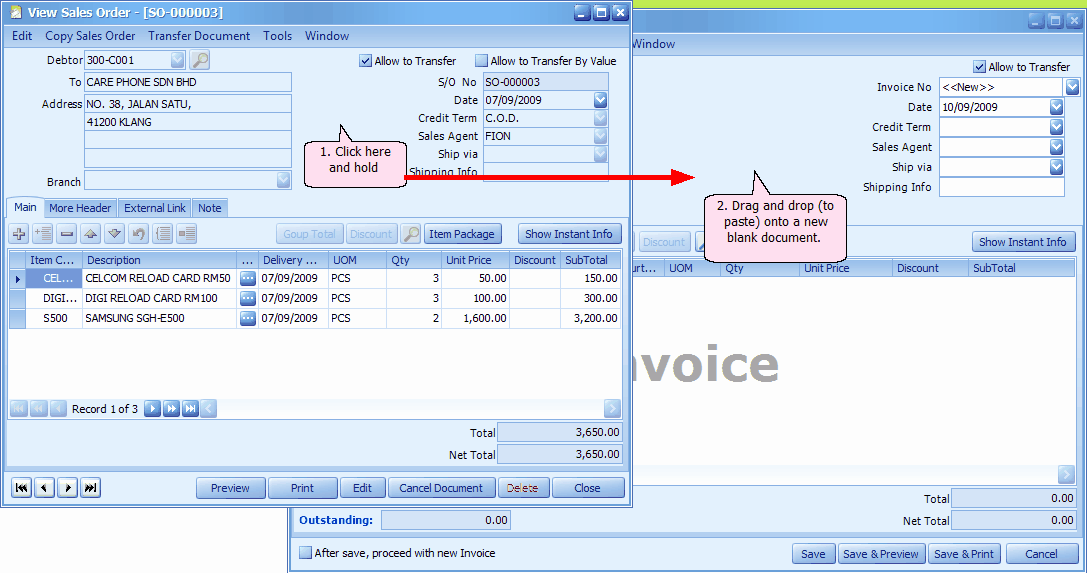
Drag and Paste
You may click on the header area of a Sales/Purchase document, and then drag and drop (to paste) onto a new blank Sales/Purchase document.
_____________________________________________________________
Send feedback about this topic to AutoCount. peter@autocountSoft.com
© 2010 Auto Count Sdn Bhd - Peter Tan. All rights reserved.